
You’ve either likely either have seen an advertisement or someone on a Onewheel and seeing how much fun they are. In the same thought, its likely crossed your mind that Onewheels could be hard to learn or that they are unsafe. There are inherent risks in almost all active outdoor sports (albeit some have more than others) however within any sport, its necessary to access the risk and reduce it so that you can enjoy the activity safely. This article is going to cover basics to getting you outdoors and experiencing that stoke from trail riding on your Onewheel.
Snapshot Skim: Step-by-Step Guide for Trail Riding
Safety Gear For Onewheel
From the barefoot shorts-and-tank top rider to the rider wearing every possible safety gear available, you will need to assess the level of risk you are going to take. For me, this depends on the weather, what terrain I will be riding and how intense I plan to be. Lets face it, if you are going to just test out the board in your living room, its not necessary you fully suit up with every piece of safety gear that you own however if you plan on taking a trip with a friend down a trail you have yet to travel and its likely friendly competition may push your limits, well then its entirely necessary to gear up.
What your comfort level is with the ride is extremely important. If I forgot my helmet and I am on an unfamiliar trail, I will not be pushing it that day. This equates to less excitement for me. So to maximize the excitement, wearing gear that feels comfortable allows me to get a little more out of each ride.
We came up with a ‘necessity value’ with the gear associated with it. Check out our post recommended safety gear for more details. Onewheel gear and accessories can get out of hand. While its, fun to buy everything, sticking to a budget and the necessities is where you should prioritize your money.
| Safety Gear | Necessity |
| Helmet | 5/5 – A Must have |
| Wrist Guards | 4/5 – Recommended |
| Gloves | 4/5 – Recommended |
| Elbow Pads | 3/5 – Terrain Based Recommendation |
| Knee Pads | 3/5 – Terrain Based Recommendation |
| Crash Pads | 2/5 – Terrain Based Recommendation |
| Sunglasses | 4/5 – Recommended |
Why Sunglasses? Well once you’ve hit a dusty trail you know why. Similarly, if you ride along a bayou or on a trail in the woods on a humid day, bugs and dirt become visual obstacles. Protecting your eyes is extremely important. Safety googles are probably a little over-the-top however helmets like Ruroc or a motocross style helmet can be a great choice especially if you pivot into EUC riding. A depending on the trail and time of day would dictate how tinted your shades are however, you’ll likely want a pair of standard sport sunglasses or a yellow-tinted set to contrast a darker trail.
Board Selection – Best Onewheel For Trail riding
To date, Future Motion has three Onewheel boards they are offering. Gone are the days of the predecessor V1, Plus and XR Onewheels. While they are no longer actively sold by Future Motion, some of these boards are superb boards and are covered here as they can be easily purchased second-hand.
Keep in mind how much you weigh. I weigh around 190 lbs. (86 kg) and have a Pint X, XR and a GT. I had sold my Pint primarily due to battery life when trail riding. More so than the type of terrain you are riding, weight has a notable factor in the Onewheel battery range. Its also important to be aware that Future Motion has a suggested weight limit of 275lb (125kg) for the GT/XR and 250lb (114kg) on Onewheel Pint. There are new Onewheel-alternatives however the data has yet to demonstrate their reliability and trustworthiness.
It is completely inconvenient when a Onewheel is out of power. While its important to take intermittent stops to check battery levels, its more important you select a Onewheel that has the proper range for your anticipated rides. Below are the advertised ranges, weight limits, and weights of Onewheels. These ranges are based on optimal conditions.
Lets review the battery ranges for the Onewheel boards (based on a 200lb rider):
| Onewheel | Battery Range |
| GT | 20-32mi / 32-51km |
| Pint X | 12-18 mi / 19-29km |
| XR | 12-18mi/ 19-29km |
| Plus | 5-7 mi / 8-11km |
| V1 | 4-6mi / 6-9km |
| Pint | 6-8 mi / 9-13km |
| CBXR / JWXR | 32-38mi / 51-61km |
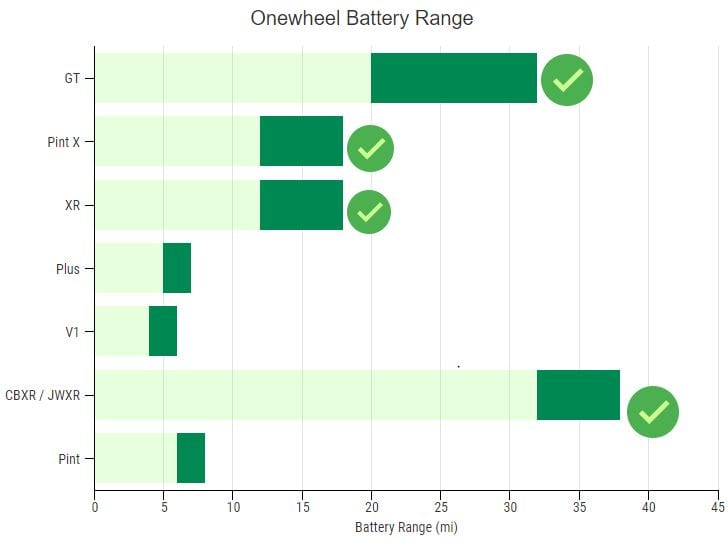
It is highly recommended to avoid the Pint, V1 and Plus models for trail riding as they would severely limit the distance of your trail ride. There are some exceptions as some modifications can be done to these boards (Chi quart battery, VNR extensions) however with the board warranties, its advisable to purchase what is available from Future Motion. XR’s currently remain highly recommended due to the large aftermarket for these boards. They are also capable of being modified so that they can out perform the GT Onewheel in trail riding. If modifying a board is daunting, rest assured that the stock XR is a great trail board. Trail riding boards should be GT, Pint X and XR only. See our post on CBXR/JWXR boards.
Weather and Trail Selection
Regarding weather, the number one rule is an obvious one but cannot be overstated. Do not ride in the rain. Avoid riding after a storm. Several videos do demonstrate that the Onewheels have a mild resilience to wet conditions but by no means are they waterproof. If rainy, snowy conditions is something you want to prepare for then its recommended your board is badgered (water proofing kit). Future Motion has made improvements in the Pint X and GT. They are made to withstand more moisture however for longer reliability and life out of your Onewheel, it is advisable to avoid wet conditions (this includes beach riding).
Wet trails, wet leaves, muddy trails leads for unreliable terrain. As you become a better rider, you will tend to have a certain trust-factor in a terrain when visualizing it. Wet trails are harder to discern due to mud and less friction.
What Are The Best Trails for Onewheels?
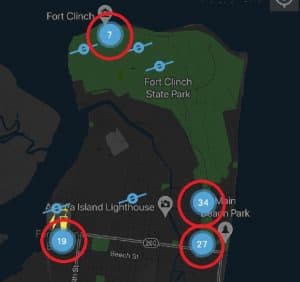
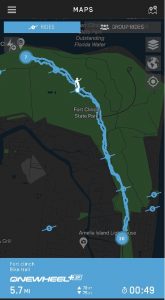
Download the Onewheel App or checkout our growing list of Onewheel Trails if you have yet to do so. You can get a good idea of great local places to ride based on the frequency of recorded rides within the map section of the app.
Clicking on the ‘Onewheel’ icon in map view, the trail is revealed along with the duration of that particular rider’s time and the path they took. This is incredibly useful for navigating trails.
Discovering trails on your own is however one of the true adventures in off-road riding. The app provides good guidance however make sure to check out ride.trailwheel.com Strava & All Trails apps. They too also provide great trails. Ideal riding conditions can be found in the following areas:
- Parks, dog parks
- Mountain biking and hiking trails
- Schoolyards
- Local rail-trails
- Wooded conservation areas
Future Motion has released “Segments” which now gives the rider the ability to create a segment (or a portion of a trail) that would be ideal for revisiting, sharing with a friend and having some competition on a path you have selected and named.
Onewheel Riding Trail Etiquette
Onewheeling is a growing hobby and as such, few laws actually specify their use within certain areas. As this hobby grows, it is the responsibility as a Onewheel rider to demonstrate respect and yielding etiquette when encountering a bystander or other riders on the path. These devices are incredibly quiet so it is also important to slowdown and announce your presence. We generally yield to all riders on the path. See our Riding Etiquette post for information on proper yielding and responsibilities of Onewheel riding.
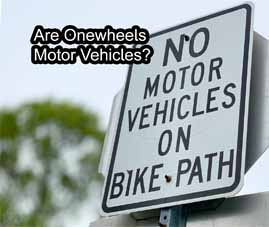
Often there we come across signs that state that no motor vehicles are allowed. And while a Onewheel does have an electric motor, it may not meet the legal definition of “motor vehicle”. In the State of Massachusetts, motor vehicle delineates automobiles, motorized bicycles and motorized scooters. The state does specify that “The definition of ”Motor vehicles” shall not include motorized bicycles.” Clearly the law has not been revised to reflect Onewheels however motorized bicycles are not considered motor vehicles. In general, state and local laws may not specify Onewheel however they may cluster them as PEV (Personal Electric Vehicle) which have different classifications. It is always good to check with local PD for clarification. See our post on if Onewheels are motorized vehicles.
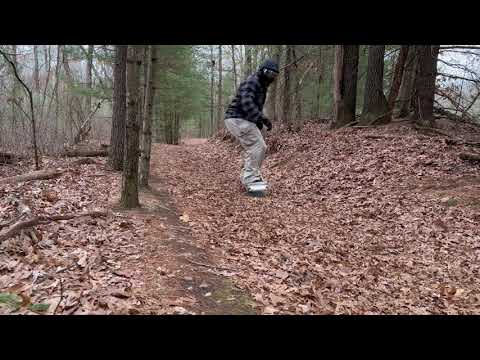
Practice and Technique
In comparison to riding an EUC, the learning curve for riding Onewheels is small however there is a difference in riding on asphalt to a trail with interesting terrain. If you are brand new to riding Onewheel, visit Start Riding Onewheel which covers all the basic board operations and stance. Unless you are an avid snowboarder, Onewheels engage the fast-twitch muscles within the calves and quads. This can be quite a workout if you are unaccustomed to isolating those muscle groups.
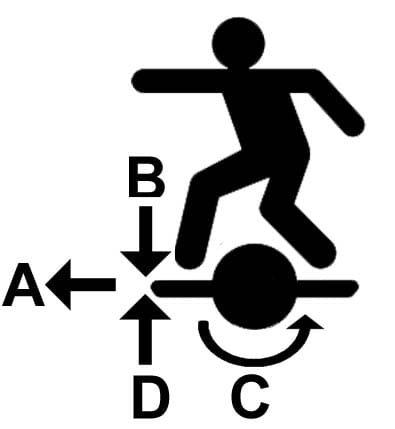
An ideal riding stance for trail riding Onewheels is where your body weight is centered over the wheel, knees are bent, and arms are actively utilized in weight distribution. The intent isn’t to swing arms wildly about however they are used as a subtle means to aide in traversing, turning, or maintaining an upright stance.
Depending on the Onewheel, it is absolutely feasible to complete a 20+ trail ride. Without practice, it will be near unlikely the quadriceps and calves can endure the ride. The nature of trail riding is going to keep these muscles engaged throughout the ride. It is an incredible workout for these muscle groups as it has the ability to engage areas that you would not normally be able to isolate at a gym.
Technique is covered more in detail here however the main concept is always keep the knees bent so they can react to the terrain and provide as the suspension for the body. The hips is how we avoid nosedives. You want to avoid leaning over the board but instead utilize your hips to control your speed and balance. This method of weight distribution allows for a lowered center of gravity and is less taxing on the motor.
Onewheel Storage and Maintenance
The storage and battery maintenance for your Onewheel will depend on how long you anticipate riding again. Onewheels are powered by large lithium-ion batteries. These batteries are the same style found in most mobile devices and electronics today. By nature, they degrade overtime so it is imperative to minimize the Onewheel’s battery degradation. This is done with proper battery storage and maintenance.
Daily riders habitually charge their boards after each ride. The main culprit to battery degradation is heat. The Onewheel app’s diagnostic page can tell you what the temperature the battery is at. While you can charge after each ride, to maximize the battery life, let the board cool to room temperature before charging. There are some instances where we need to charge quickly and that is where the Hyper-charger comes in handy. You do want to be mindful to not make the hyper-charger a daily habit as fast charging causes more heat. More heat means faster battery degradation.
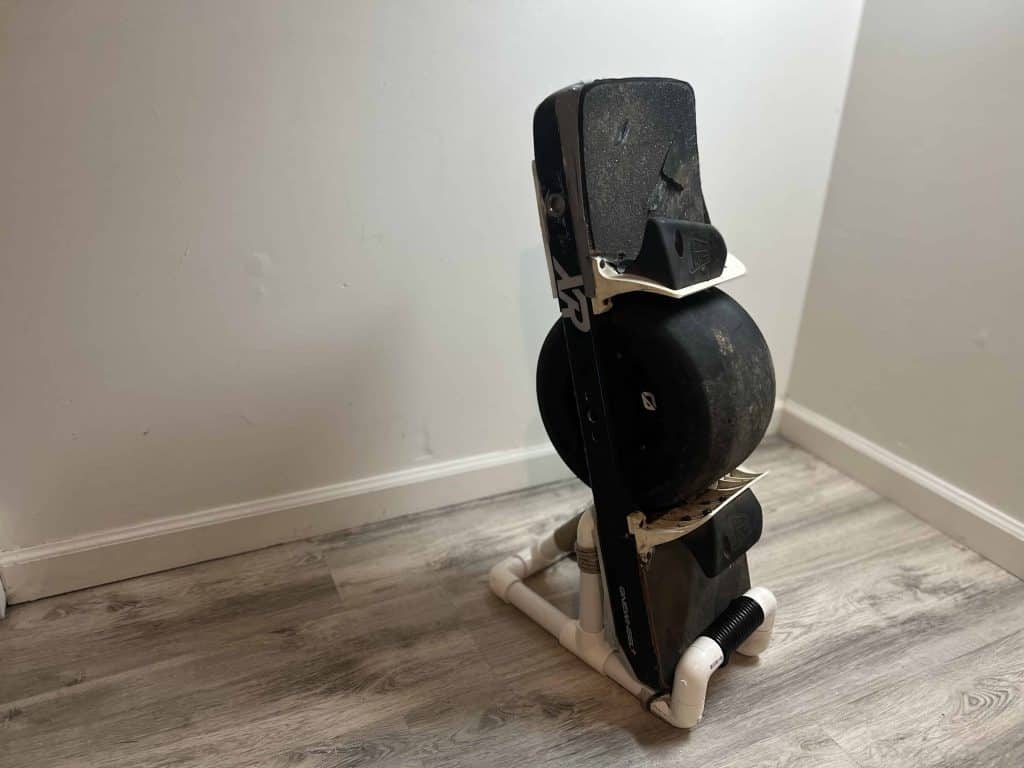
Storing your Onewheel over the winter or for any timeframe over a month, it is advisable to ensure the battery life is between 30% to 50% and that the board is stowed in a temperate dry room. The nature of charging and discharging lithium-ion will cause some degree of degradation. So with proper storage, charging the board with a standard charger in room temperature conditions, will extend the life of the battery.
My Onewheel XR has over 1000 miles and 2 years of use and it still can travel 12 miles in range. Don’t be overly concerned with battery degradation but know that it is inevitable however it can be minimized. Balancing the battery cells is also important. This is a simple process by leaving the board plugged in overnight. For the GT, you will need to remove the 90% limiter. Future Motion recommends leaving the board charged overnight at least every couple of weeks (do not leave the board plugged in for more than 1 to 2 days).
Accessories
You do not need any accessories in getting started with Onewheel trail riding. Over time however, you may find that certain products may help or comfort the ride. The following Onewheel accessories are recommended to making the ride more enjoyable and engaging.
- Rail Guards
- Fender
- Power Button Cover / Plug
- Charging Port Plug
- Flight Fins or a Wedge
- Treaded Tire
- Concave footpads / Grip tape
- Float Plates
- Rails
- Fangs and BANGs
Rail guards are generally a stock add-on from Future Motion. They are not entirely needed however it does keep your rails from being marred up on a trail. Some riders take pride in the battle scars and do not use these. These serve no other purpose than to customize the color of your board and protect rails.
A fender on a Onewheel will keep rocks, dirt and debris from landing all along your legs when you ride. On a dry sunny day, I often do not use a fender. Because its weather-related for me, I recommend a fender that can be detached and reattached easily. Flight Fins and Craft and Ride have good solutions for quick and easy fender removal. The one wheel looks so gnarly without a fender, so often I just cant get myself to put it on.
Power button covers are mainly for the XR. The XR power button is not as resilient to moisture as the GT and Pint X. The power button cover is an accessory for keeping debris and moisture away from the power button.
Charging port plugs cover the AC port. They should come as a standard from Future Motion but they do not. All the boards are sold with an exposed charging port. So that no debris gets lodged into the charging port or so that water or moisture does not find its way into the port, a charging port cover not only personalizes your board (sold in every color possible), but it also keeps a clean port. This is imperative when off road riding. Damaging the port can be a major headache.
Flight Fins and wedges are two solutions to lock you into the Onewheel a bit more. Many riders do not like being ‘locked in’ as it can be a possible issue when bailing / failing. With the nature of trail riding, there are many instances where you will need to unload your weight from the board. This is a common technique in nudging and bonking. Fins or a wedge are not necessarily needed however being able to lift the board over larger branches or roots can allow for riding more extreme trails. I have equipped Flight fins on all my boards except the GT. Flight Fins are a great aide in trail riding however as I become more skilled in trail riding, I find that a simple wedge would do everything I need without being so locked into the board.
A treaded tire is going to grip the trail more-so than a slick. That being said, a slick does a great job. I find that a treaded tire is not necessarily needed unless you are in damp or wet conditions (which should be avoided). A treaded tire provides for better trail traction however the slick is just as incredible to ride on trails.
The GT has concavity built into the board which makes for a far more comforting ride. XR and Pint riders should consider a concave footpad solution. Concavity provides for a more secured stance allowing for more control of the board. The way the foot rests over the concave pad is more comforting over miles of riding than a flat surface. Aftermarket grip tape can also add for incredible contact to the board.
Within the Onewheel’s footpads is the BMS (battery management system), controller, and battery. The stock bumpers are the only protection for these components. Float plates are an extra layer of (usually) plastic intended to take the wear instead of your board. These do add a slight amount of weight to the board however if you want to keep your board long lasting, these might be a good solution. It is important to note however that stock bumpers are replaceable. Float plates add an extra layer so there’s never a hole going into where the elements of the board are located.
Custom rails is the evolution of Onewheel. Tech-rails, Floatlife, Flight Fins and others have some variant of shortened, bent or adjustable rails. All are intended to provide better agility, speed and control of the board. This is going to be a growing arena in Onewheel riding where personal preference will dictate which rail suits you. The stock rail however does incredibly. These custom rails are really meant for more comfort and leveling up beyond the capabilities of the stock rails.
Fangs and Bash and BANGs are listed last as they really are more intended for street riding. They both can help save you in a nosedive situation as fangs are wheels located on the front of your board allowing you to ride out a nosedive. They do not do so well in saving a nose dive on trail riding. BANGs are super smooth bumpers allowing you to slide out of a nose dive (mostly however they are utilized in rail grinding).
In conclusion, starting to ride trails on a one wheel really only requires a board and safety gear. Practicing over time will improve technique. As you ride, you will find what comforts suit you and accessories will be added. If you have yet to trail ride, get out there on a XR, Pint X or GT and feel it out. Admire the beauty of the trail and in little time, the affection for the ride will happen.
Learn more:
One of the Onewheel's greatest attributes is that it is all-terrain. If you bought or plan to buy a Onewheel for the purposes of exploring the outdoors, then this is a great reference guide for you....
If any electric skateboards or devices are in your area, you may find that the one wheel is less prevalent than traditional electric skateboards. This is because Onewheels are in a class of their...
2 thoughts on “Trail Riding a Onewheel – [Checklist & Guide]”