Onewheel enthusiasts! Welcome to the Onewheel Maintenance Guide, your go-to resource for keeping your beloved board in tip-top shape. Onewheels are fairly low maintenance PEV’s however to ensure that you can enjoy the ultimate riding experience every time, while also maximizing the most life out of your Onewheel, it’s essential to give your board some well-deserved TLC.
Regular maintenance might doesn’t sound exciting, but trust me when I say that it’s the secret sauce to keeping your Onewheel rolling smoothly. Invest a little time and effort into maintenance after every ride and periodically checking into bigger components to extend the life of your components, and ensure your safety on every adventure.
Essential Tools For Onewheel Maintenance
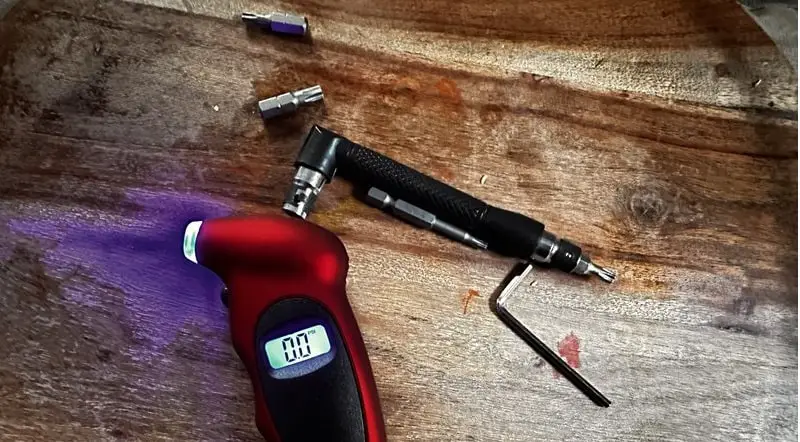
To do proper maintenance, you will need tools to work on the board. I carry my maintenance tool kit in my car. Here is what every kit needs. Most parts are available on Amazon, Craft and Ride & Floatlife’s websites.
- Nylon Brush
- Tool Kit (GT/GTS, XR, Pint & Pint X) (XR, Plus & V1 can use basic Allen key set & small Phillips screwdriver)
- Tire Gauge & Air Compressor (optional compressed air nozzle)
- Tire Plug Repair Kit
- Flowable Silicone
Daily Maintenance For Onewheel – Visual, Brush, Tighten & Air
Lets be straight up, Onewheel maintenance is very minimal however to keep the ride long lasting, some maintenance should be performed. Your go-to tools for daily maintenance is going to be the nylon brush and your footpad & bumper bit (1/8′ hex for XR, TP25 Torx Plus Bit for GT and T20 for Pint & Pint X). Compressed air and a tire gauge is also recommended.
Visual Inspection of the Onewheel
We are talking very cursory here. After a ride, you should always get in the habit of visually scanning your Onewheel for anything out of the norm. Keep an eye on loose bolts, cracked lights or bumpers, weeping tire slime, or any lose components. Clearly if there’s anything wrong here attend to it ASAP. The practice of doing this after every ride is important so that you do not neglect a problem.
Most prone areas for loose bolts is on the bumper. If you have recently replaced a footpad or rail, its good practice to make sure they are hand tight (hub bolts should be tightened down).
Brushing off Onewheel Trail Grit
Dirt can act as an abrasive and wear down the grip tape, making it less effective. Dirt and debris can also infiltrate the motor or wheel bearings, potentially leading to decreased performance or premature wear. While it seems like a small job, it is important to keep the board tidy so that it last as long as possible.
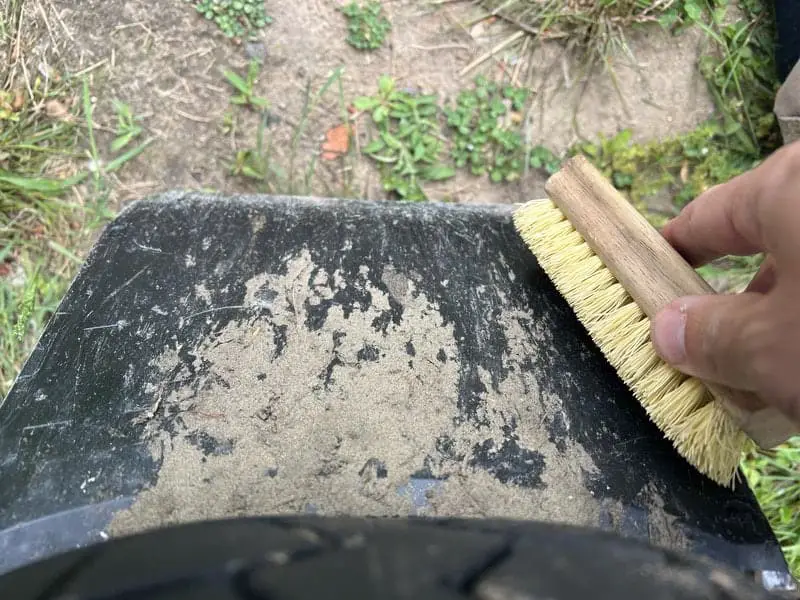
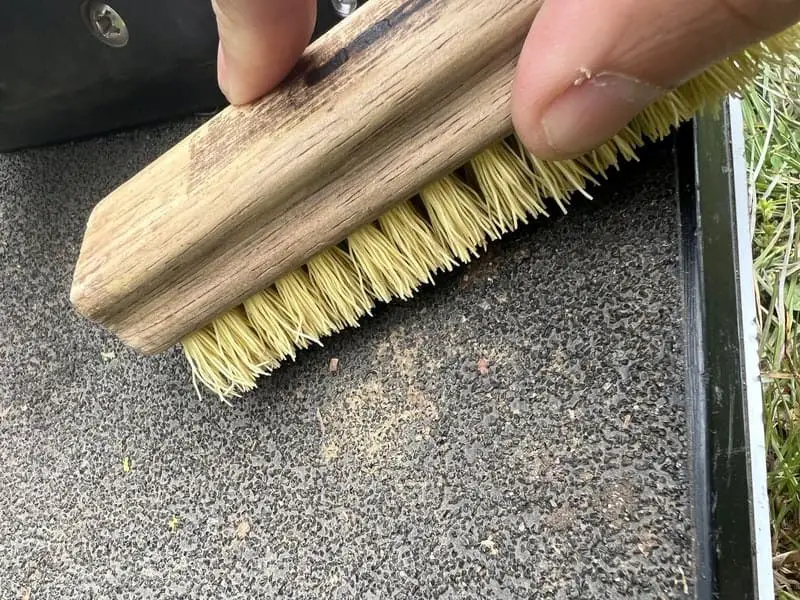
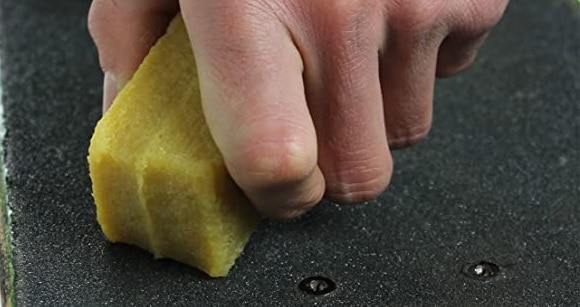
The nylon brush is the cheapest and yet most used tool for daily maintenance. After every trail ride, brushing off dirt, mud, and debris keeps a tidy ride and keeps the grip tape gripping and the board smooth rolling. Use it on the bumpers, footpads, tire and the rails. Footpad erasers can take the grip tape to a cleaner level but I don’t use them as often.
If you use a fender or Flight Fins, the challenge is getting the grit out from behind the fender and shield. An air compressor with a compressed air nozzle can help (check amazon price).
A cheaper method is to use a long screw driver and manipulate a rag between the tire and fender for a cleaning.
Using a Q-tip is optional however rubbing the axle grit off with a Q-tip is always a good idea.
Tighten Down Bumper & Fender Bolts
If you ride a stock Onewheel, this may be of little concern however it is good habit to quickly go over the top and underside of the Onewheel to ensure that the bolts are secured. This is especially important if you have swapped out components. You do not want to over-tighten these bolts as you can easily strip the aluminum rail threads. Grab your bit (1/8′ hex for XR, TP25 Torx Plus Bit for GT and T20 for Pint & Pint X) and stuff it into a small handle wrench (comes with most Onewheel tool kits).
You can still overtighten your bolts with this wrench however you are less likely to over someone using power tools. Hand tighten and that’s it. Do not use Loctite. Even blue Loctite can compromise the plastics of the Onewheel.
If you have completed a rail swap, it’s good practice to grab your axle bit (1/4″ hex for XR, T30 Torx for Pint & Pint X and TP45 Torx Plus for GT).
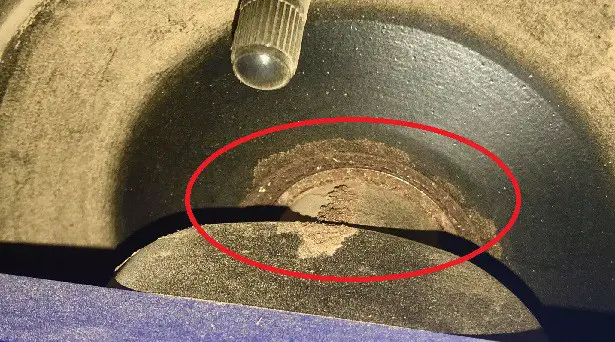
Pay close attention to the bolts on the underside of your tail side. If you tend to use a Quikstop as your way of stopping your Onewheel, the bumper can wear down to the bolts. Avoid waiting to long and having stripped bolts. Check these and replace them before the heads strip.
Air Check – Check and Add If Needed
Most experienced riders have a PSI preference for their Onewheel. Because everything is relying on that one wheel, the PSI morphs the feel of the ride. Getting used to a particular PSI and dialing it in is important. Check our Onewheel Tire PSI calculator to get a good range for you if you are unsure where you are.
Once you have a preferred PSI, you should have either a small digital tire gauge or a portable compressor that can dial in and read PSI. I have both and both are helpful for different scenarios.
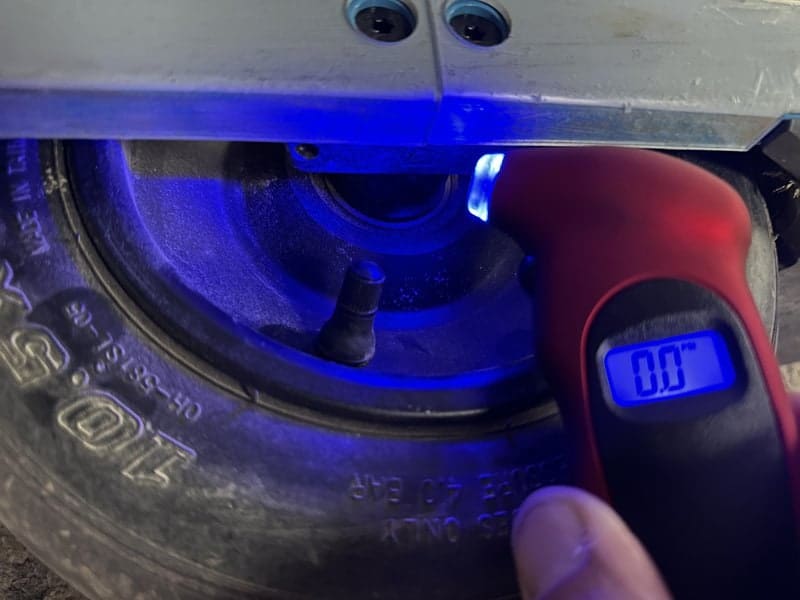
I bought the Pint & Pint X toolkit off Amazon and use their tools and gauge often. It doesn’t have the compressed air element so I still carry a portable air compressor to add air when need be.
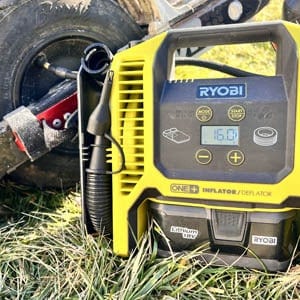
Ryobi’s portable Air Compressor on Amazon is legit. I use it for camping and One wheel riding so I get my money’s worth out of it.
Hooking up and having ample air for you and fellow riders is always a plus. Floatlife sells a Hella Small Pump (check price on Amazon) that works great too. I stuck with Ryobi because I already have their One+ tool set.
Weekly Onewheel Check-up and Maintenance Routine
Assuming you are staying on top of daily maintenance, weekly inspections are minimal. Weekly inspections are dedicated to the tire, bearings, rails and replacement parts.
Tire Inspection
If you find yourself adding air to your tire often throughout the week then likely you have a tire leak. Because the Onewheel has tire-slime, a weeping tire is the most obvious sign of a leak. Another problematic area is around a float saver or you have a dented rim, air can escape here. If you have float savers installed and there are no dents on the rim, its possible that air may be escaping around the float saver. Dents in the hub need to be replaced if they cant be bent back to form.
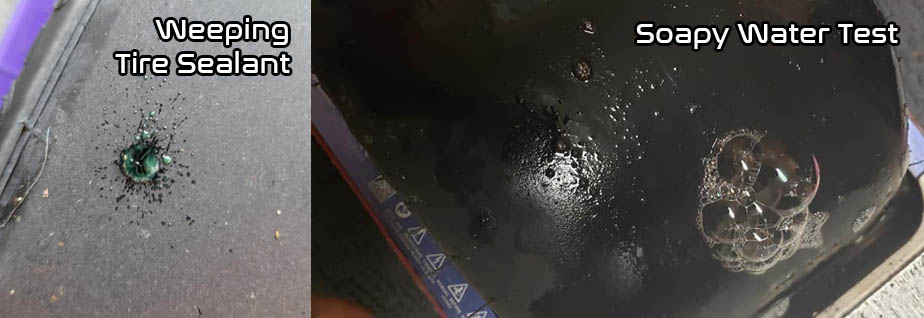
Float saver leaks may require you to remove the tire and reseat the bead whereas a weeping tire can be fixed without having to remove the tire. See our post on how to plug a Onewheel tire. Its a simple process. Having a plug kit (check amazon) will save you money after one use. I’ve used mine over 5 times in a year. Its a true life saver!
It should go without saying but if you have ridden your Onewheel tire down to the threads, there is no repairing the tire. It needs to be replaced at this time.
Axle & Bearing Check
If you are not hearing a whirling or unusual sound from the axle / hub area, likely your bearings are fine. A test for worn bearings is with the board turned off and the tire on the ground, see if there is any left-to-right play in the wheel. The wheel should not budge at all. If there is any slight play in the wheel, likely the bearings are worn (especially if you are over 1,500 miles).
Dirt can find its way into the inner and outer race of the bearings. Typically however, dirt will collect along the outside area. Compressed air takes care of most of it. You can wipe the area as well with Q-tips and that can really help clean this space out.
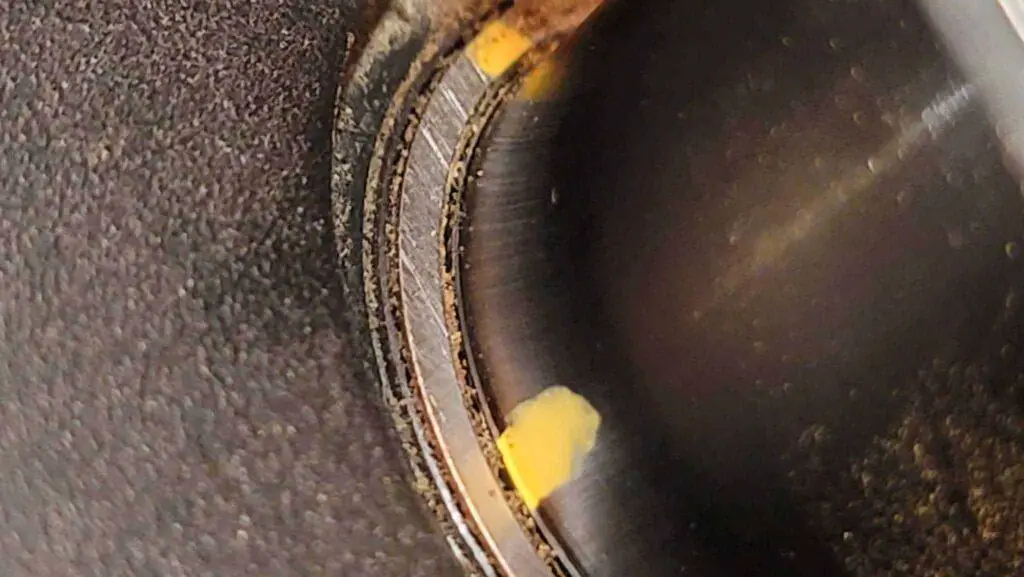
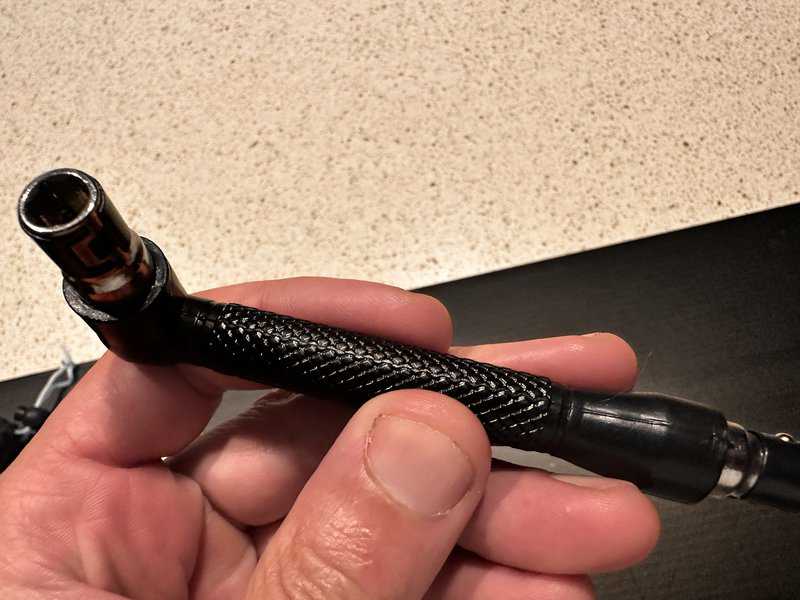
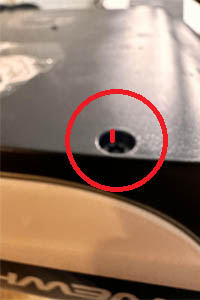
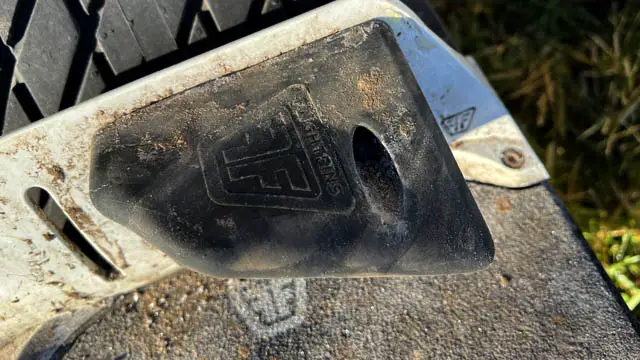
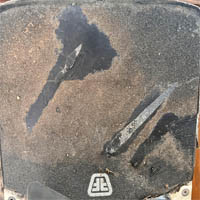
If you are concerned about your bearings, you can place a mark with a paint marker on that metal ring closest to the axle and check if it has moved after riding. In this image, the paint lines no longer line up indicating that there is movement.
If it has moved, this means your bearings are slipping and likely are damaging the softer aluminum axle. These should be replaced as soon as possible. Also see our post on thin axle concerns.
If you ride often in wet conditions, Float Life sells bearing covers (Badgerwheel product). These need to be installed on clean and debris-free space and they help protect the bearings. If these are not installed properly however, they can damage the bearings. I would not add any grease to the outside of the axle area as it becomes a magnet for collecting dirt. If you are considering this, use Badgerwheel’s bearing protection product or consider replacing the bearings. Bearing replacements will require a press or a visit to a repair shop.
Cleaning Bearings With a Cotton Swab or Compressed Air
Once a week you should clear out the grit that accumulates on the Onewheel bearings. While a cotton swab does the trick, compressed air does is my preference.
A cheap air nozzle from Amazon is perfect for the job because it focuses all the air pressure from the tip producing up to 90 PSI. It does the trick for my boards. The air gun really can focus into the space and keeps the grit and sand away.
Rail Maintenance
Rails should be a zero-maintenance part however if you ride adjustable rails like switchblades, around this time its a good opportunity to check and tightening down the rail bolts. Give the rails a glance for any major signs of wear. Nothing should be concerning but noting damage is just good practice to stay on top of.
If the rails have been removed whether to replace a tire, rails, etc, you should confirm that the hub holts are tight. If they are loose, you can experience wobbling. Onewheel wobbles are most commonly due to an imbalance on the board however you most definitely will have wobbling if your hub bolts are loose.
Replacement Part Maintenance
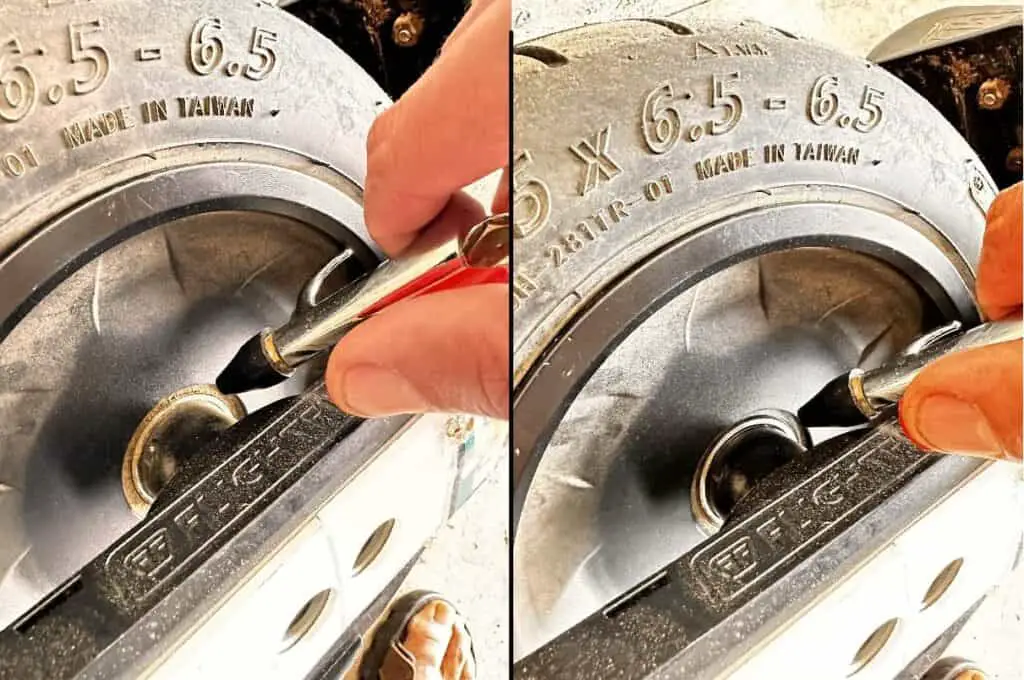
Grip tape, Flight Fins, Fangs, fenders and bumpers should be given a quick visual. With Fins or Wedges we want to make sure the base or fin is secure. Sometimes these can shake loose.
Take a hex tool to the base and a Phillips screwdriver to the fin to make sure they haven’t loosened from your trail rides.
This applies to the fenders and bumpers as well. Daily you should already be checking the bumper screws however at week’s end, if you’ve worn through the bumper, its time for replacement.
Grip tape is pretty resilient if you have flat contact and gum rubber sole shoes. Because I trail ride often, I would also wear trail running sneakers so I could explorer a bit on foot too. The issue is that these types of sneakers generally have aggressive tread and focuses your weight in the treading which can prematurely wear out the grip tape.
Replace a foot pad or just the grip tape when the pad starts balding. I’ve had some success buying grip tape on Amazon and placing it on the problem areas.
Monthly Onewheel Maintenance Routine – Long-term Maintenance
Monthly items are elements really are devoted to the battery, hand tightening screws and firmware:
Hand Tighten Screws
Especially if you are riding on trails often or doing stunts on the streets, its crucial to make a concerted effort to take a moment and hand tighten the screws on your Onewheel. Its even more important if you have done any modifications to the board.
While it is good advice to take off the bumpers and make sure the screws along the rails are tight, at a bare minimum, you should be going over all exterior screws along the bumpers, flight fins, and fender (if you have those) and tighten them down. Do not over tighten. These are plastic components so it is very easy to over tighten them. Just tighten them down enough where there is some resistance. We are looking for screws that were obviously loose. We are not looking to over tighten snug screws.
Battery Balancing and Maintenance
Once a month, This is a good time to balance the battery by leaving it charged overnight. Assuming you have a GT, later firmware XR or Pint and do not have access to the cell data, we really can only try to keep a healthy battery. The main ways to doing this is by minimizing the use of a hyper-charger, not leaving it fully charged or discharged for long periods and storing our boards in temperate areas.
If you are a daily rider, you will start to get an expectation for your range. Always record your rides. Being able to compare old rides and the battery usage is a good way to see if your battery is starting to show signs of replacement. If you have properly maintained the battery, you shouldn’t have to worry about this for the first 800 to 1200 miles.
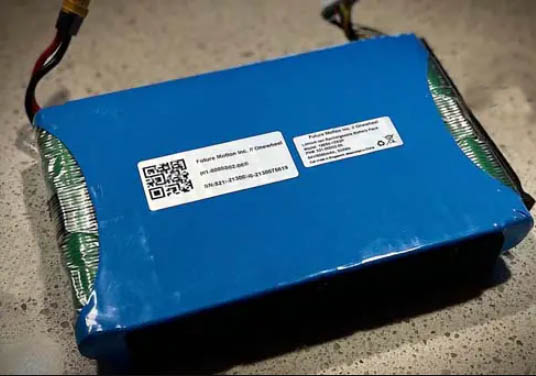
If your battery needs replacement, only if you have an OG pint or XR would I recommend replacing the battery on your own or sending it to a repair shop. This way you will have access to aftermarket batteries such as a CBXR or Quart battery.
Because Future Motion now offers battery replacements, if you have a Pint X, or GT its best to send it into Future Motion for the repair. Prices for the battery and labor are reasonable. This is why its very important to keep your Onewheel packaging.
The main point to consider for this is to never allow your onewheel to sit in a low or high state of charge. This will compromise the lifetime of the battery. Always store your Onewheel with at or around 50% battery charge especially if you don’t anticipate riding within the near future.
Firmware Check-up
With the GT, custom shaping was not initially available and then released about 18 months later. Also, the riding profiles were modified later down the road. Every month or so, it’s good habit to check for updates. You do not want to be left behind when new profiles or attributes are released.
Firmware updates are fairly straight forward. They always are completed within the Onewheel app.
Seal Once You Go Beyond the Bumper Area
Once you open the bumper area, you have a visual on the controller and battery boxes. Flowable silicone (cheap on amazon) is the perfect medium for waterproofing your board. Especially if you open either box, this is the perfect opportunity to seal the seams with the windshield silicone.
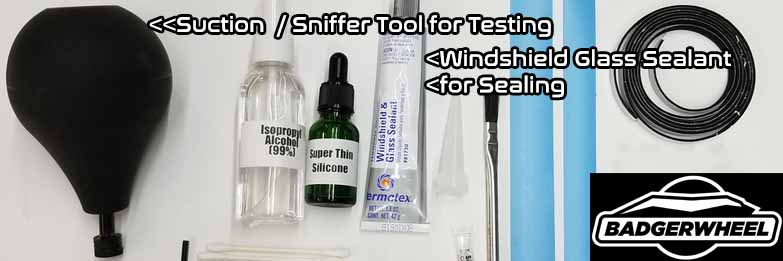
Badger Kits mainly focus on sealing your board with flowable silicone (windshield sealant but it also has a sniffer for testing as well as cleaning agents and gaskets to go a step forward. It is worth picking up however the silicone will be what waterproofs most areas.
If you are riding often in water, make sure to seal the grip tape area so that the sensor doesn’t get wet as well. With flowable silicone, when it dries it is completely easy to remove. You can just peel it off so don’t worry about over doing it. Flowable silicone will help save your electronics on your Onewheel.
Summary
If you stay on top of these items, this will help keep your Onewheel riding for thousands of miles. Beyond this guide gets into opening the battery, motor/stator or controller box. If you are going this far into the maintenance, then it may be time to consider converting the board into a VESC board or using the board as a project board. The main take away from this guide is to ensure you keep up on little elements so that they don’t become safety concerns later on or more problematic issues.
If you do have intermittent power and torque issues, this could be signs of a wearing motor. Rather than repairing this item, you can typically find a full hub assembly for a reasonable price. Stay on top of your routine and keep a clean board so that it can last you for the long haul. Float on!
Recent Posts
The best way to track your Onewheel is to have an Apple Airtag or a Samsung SmartTag hidden within your Onewheel GT somewhere. While the goal is to hide these trackers within the board, the tracker...
Riding a Onewheel on grass can be a fun way to get around (especially if its out on a golf course) but there are some things you should know before you take your board out for a spin. Yes, the...