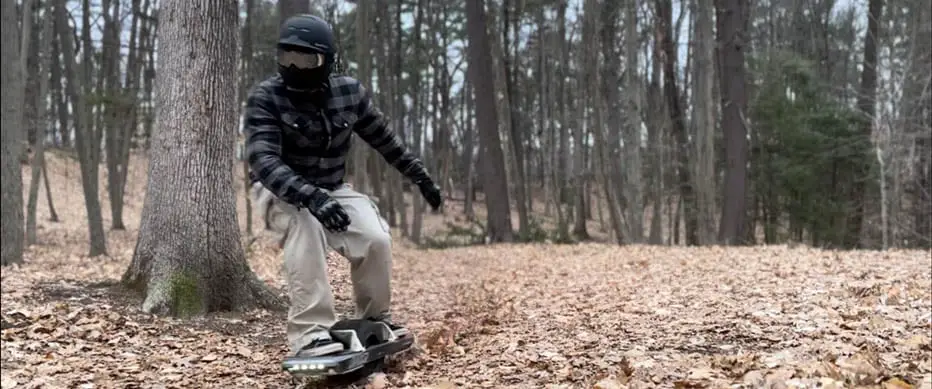
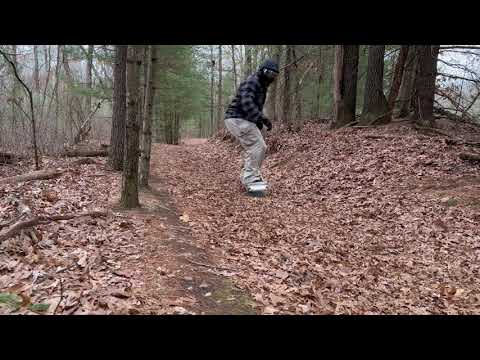
One of the Onewheel’s greatest attributes is that it is all-terrain. If you bought or plan to buy a Onewheel for the purposes of exploring the outdoors, then this is a great reference guide for you. This post covers the basics of trail riding as well as important tips and tricks to maintain a safe ride.
Depending on the terrain (roots, rocks and other objects along the trail or a smooth path), trail riding with a Onewheel can vary from something leisurely to an intense workout that engages your core and leg muscles.
Rider Checklist – Pre-ride Checklist Before Hitting a Trail
It is far easier (logistically speaking) to enjoy the outdoors on a Onewheel compared to a snowboard, mountain bike, dirt bike or any other ATV. You simply just make sure your board is charged and go right? Well, almost. Other than having a fully charged board, Its important to have a few things covered.
See our Onewheel pre-ride checklist. While as a Onewheel rider we can hop into the woods without any sort of trailer or hitch attachment. Its important to carry along some essentials such as a portable battery bank, safety gear, and even a spare board (depending on how long of a ride you intend on taking). A tire gauge and pump are great to keep stowed in your trunk as well. While none of this is completely necessary, most are simple enough to keep in your trunk to make trail riding more enjoyable.
Trail Selection: Choosing the Right Trail for Onewheel Riding
Lets assume you are proficient in riding or have a basic understanding of how a Onewheel operates. Choosing the right trail is going to make or break your feelings on riding trails or even riding Onewheels. Taking a Onewheel down an incredibly chunky or thick trail can be done but it may not be that enjoyable. Some bits with chunk can be great but a whole path that is overgrown can be to much work to get through.
Finding the right Onewheel trail:
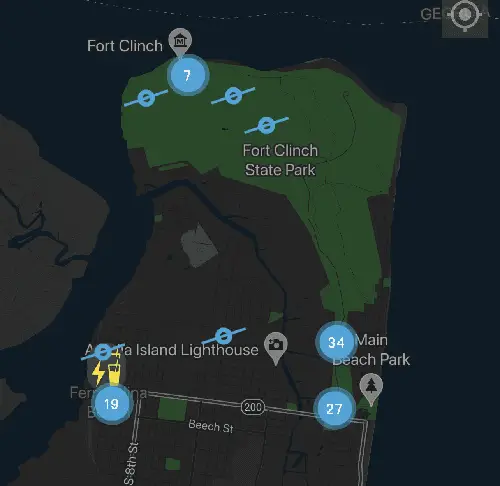
- Check the Onewheel App for a heavy concentration of rides near your area.
- Focus on ones in parks or along paths (view it in aerial view).
- Read the comments from the riders that have already been on those trails. Often riders will say if its a rough ride or not.
- Use the All-Trails website or app for finding hidden gems. Search for mountain biking, walking or hiking trails. Because this app is used more by hikers and bikers, double check the elevation gain. Choose subtle variances).
If this is your very first time on the trail, it may be sage advice to walk, bike or jog the trail prior so that you can see what types of obstacles are along the path. Some of my favorite trails still surprise me after a storm or winter season. Its not uncommon to see a down tree or debris on trails. The Onewheel typically can maneuver around it or you can port over the objects, but anyhow it is a good idea to see what you are up against ahead of time.
Weather: Avoid Riding in the Rain or Snow
Avoid riding on trails during a rainstorm or even the snow. The Onewheel can handle the light snow and rain but the terrain can be unpredictable when its wet. Mud, frost and snow can quickly offset your center of gravity on a ride which likely will result in a painful fall. When we ride a Onewheel, we set our stance that allows us to accelerate, if there is any unanticipated slipping that occurs, a nosedive may happen. This is why its extremely important to gain experience on riding on different terrain and get a feel of how it reacts to the wheel.
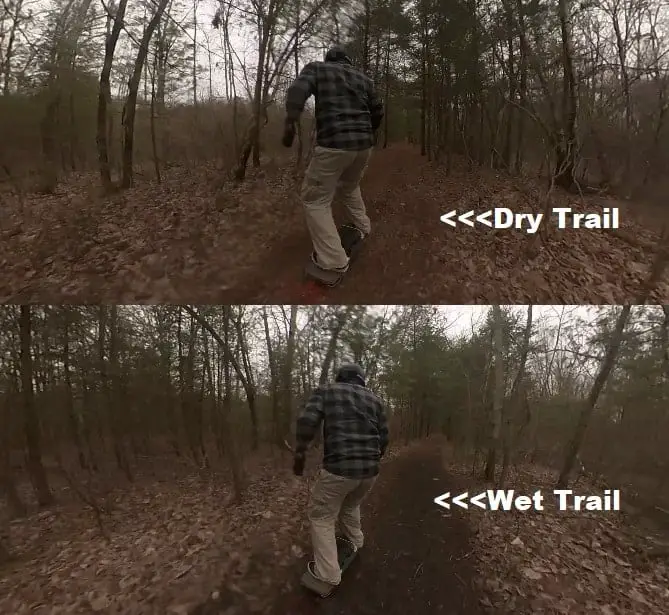
A day or so after a rainstorm can still leave damp trails. As a trail rider, its important to visually scan the terrain ahead of you within 15 yards of your path. Not only to visually scan for objects to maneuver around but to assess the color of the trail. Color can tell you a lot.
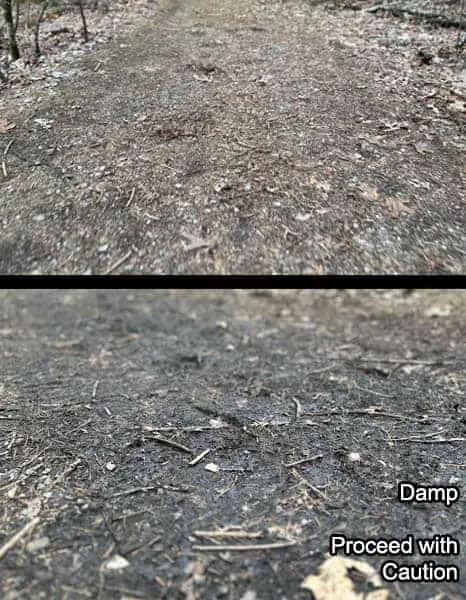
Dry, Damp and Wet Trails
If there is a darken coloration change in the trail, it likely could mean that the trail is damp or wet. Even if its not full on mud (visually), there could be mud below the surface or it could be wet or soft enough to cause a nose dive.
When approaching these dark spots, slow down and go around it (if possible). Typically trails have a concavity to them so riding the edge of the trail can usually help avoiding these damp (low) spots. You can ride over them but do not ride with too much confidence and don’t assume your board will just fly over it. Proceed with caution. it is a better judgement call to ride around it.
I ride without a fender and one of the perks is you can glance at your tire as you ride. You can instantly gauge how wet the terrain is by the tire color. Obviously, if its spraying water up on you the trail is wet, but it is a good dipstick measure for those questionable trails.
Avoid the Prolonged Super Chunky Trails

This is in no way condoning riding train tracks. Railways can be and are dangerous. This is simply for comparison. Rocks along a trail similar to ones found on a train tracks path can be ridden over by a Onewheel however over a longer time it can be annoying and or bothersome.
Attempt to avoid rocky trails that carry on for more than 1/4 mile or so as it can cause foot fatigue. Seek smoother trails if possible.
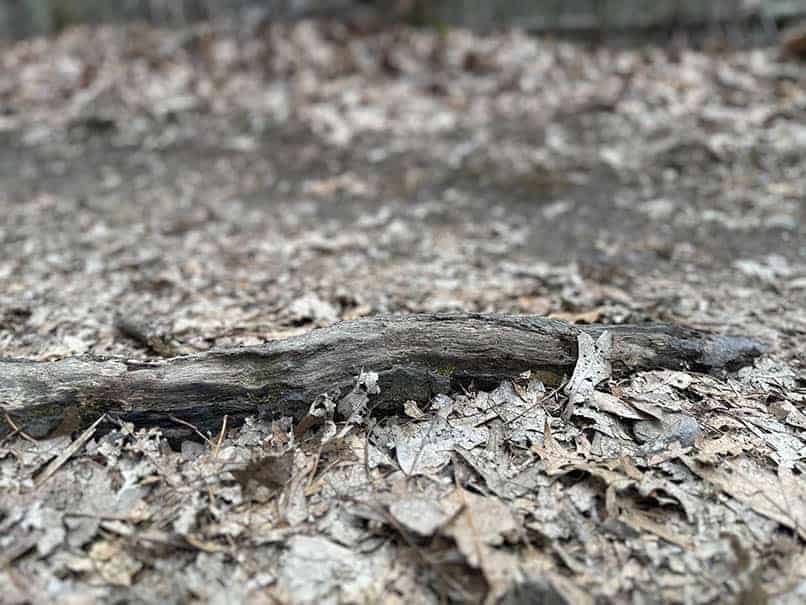
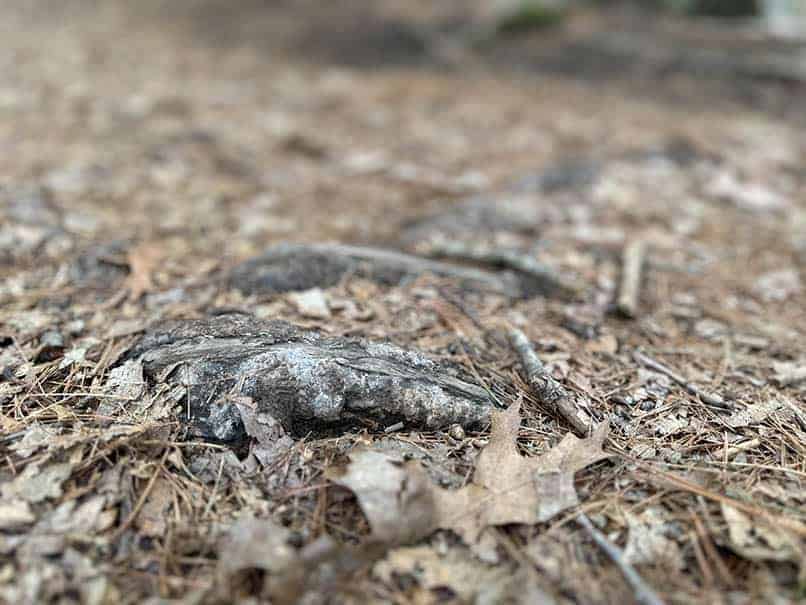
Pay Attention to Hidden Roots, Rocks, Holes and Other Obstacles When Riding
Always scan the terrain immediately ahead of you. Your eyes should be focused on the 15 yards ahead of your path while also visually scanning further every 5 seconds or so. Eyes up and eyes down on repeat.
One of the fun challenges in trail riding with a Onewheel are the obstacles on the path. Think of them like moguls on the ski slopes. You can bonk over them or maneuver between them. These are split second judgement calls you will be making as you ride. You always need to keep an eye for these especially on leave covered trails. Below we will discuss how to overcome these however its important to know that you should be always try to maneuver around anything that protrudes out of the ground by more than 3 inches (unless you want to add some challenging fun to your ride).
You can ride over objects that are over 3″ in height however it does require a skill similar to curb nudging or the use of FlightFins or Overlanders. Remember, the wheel is incredibly agile as the point of contact is just a portion of one wheel. It can surprisingly fit in between roots, rocks, sticks, etc.
Holes are incredibly tough. You may come across a mole hole or a hole that a dog has dug out along a dog path. Depending on the size of the hole, you should avoid riding over it. Again, Flight Fins are helpful however if the hole has diameter or distance greater than 3″, be cautious.
Hiking and mountain bike paths are rife with roots and rocks. You can send a Onewheel over these with ease however you need to be aware of them.
If you are riding on a path at 15 mph and do not see a root, small stump or rock in your path, then prepare to be set off kilter or even airborne.
Even smaller roots can be a trick to see. The main key in avoiding being set off kilter or being sent airborne is you need suspension on your ride. The main suspension you have is in your knees. Be ready to absorb the shocks over the trail. Hidden roots and rocks are exciting and challenging – stay focused on the path ahead.
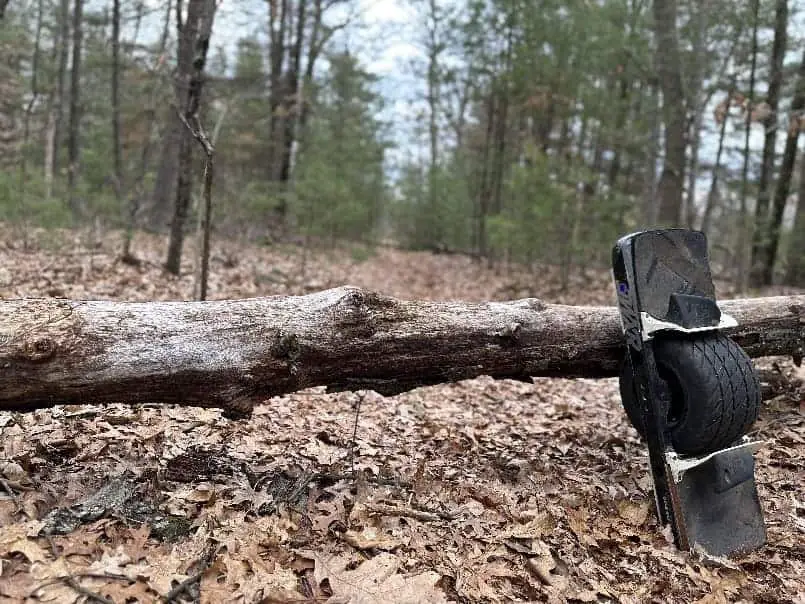
Larger Obstacles – Fell tree or large rocks
If there is a tree that has fallen across the path that isn’t feasibly possible to ride over. This is the perfect time to stretch out the calves a bit. Hop over the obstacle, use it as a place to stretch and most importantly, check your battery.
While the reported mileage on a Onewheel can range over 30 miles (GT and CBXR / JWXR), trail riding will likely cut that short (especially if you are a heavier rider).
If you ride a GT or CBXR, you can expect to ride for 15 miles with no sweat (assuming your battery is in good shape and that the battery has been properly maintained). If you are nearing 10 to 12 miles, you should be actively checking your battery.
Battery Health – Percentages, reliability and caution
Some sage advice to follow is do not rely on your board if it the battery is under 30%. Not only does it have less torque, but its possible (depending on the batteries condition), it may cut out before reaching 0%. Riding with a lower percentage battery feels different and eventually you can feel that the lower voltage is not going to give you the same feel and support over trails and obstacles.
There are times where I am still riding with a battery under 30% but it is merely to get back to the car and I am in no way pushing the limits of the board. I cannot emphasize enough that riding a low percentage battery through the woods can be dangerous. Do not rely on the board like you would at a higher charge. Take the time feeling what lower voltage rides like so you can identify it immediately as you ride. Note that it is also bad for the battery’s health to completely drain it.
Rider Stance For Trail Riding
Intuitively when you first hop on a Onewheel, newer riders will tend to place their feet at the edges of the foot pads thinking this wider stance will give them better support on a ride (especially a ride that is on uneven surface like a trail).
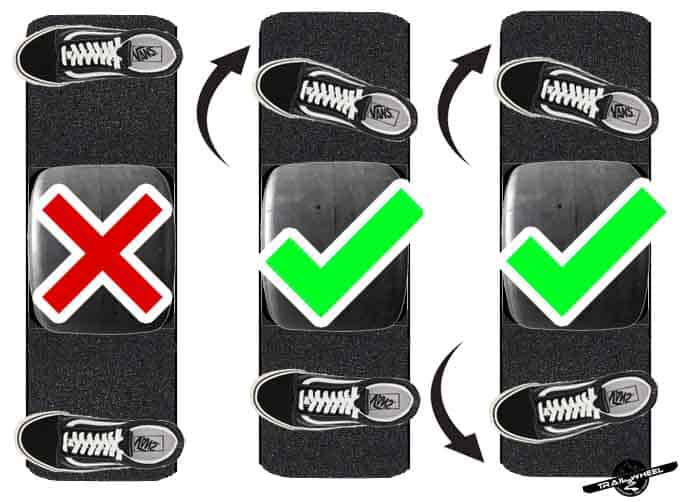
Believe it or not, when your feet are on the edges of the board, it has further to travel to correct the balancing and the motor has to do more work as your weight is leveraged out on the edges of the board.
A more stable stance is one where the feet are positioned in the middle of the foot pads (even on the closer side of the wheel). This allows even the slightest movements to balance the board and does not give as much strain on the motor.
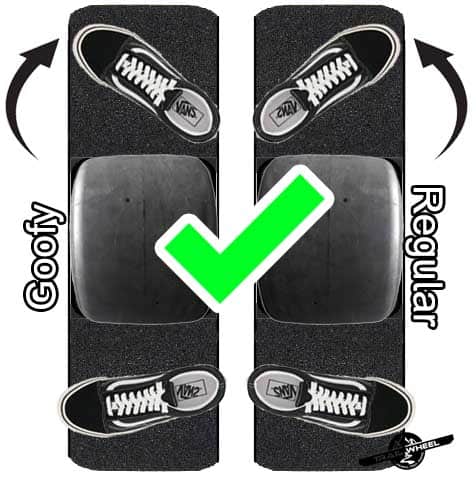
Minimizing Wobbling – Its all about diagonal foot placement
Whether you are a goofy or regular rider, its also helpful to place your leading foot diagonally. If it feels comfortable to do the rear foot as well, do it. This helps with diagonal tension which can quell much of the wobbling that may occur on the ride.
This diagonal tension is basically a way to evenly split your weight across the board from a leading toe side to the opposite diagonal end. I like to think of my leading toes as “wobble dampeners“. If any wobbling occurs, I just apply more pressure to the leading toe foot (foot has to be diagonal).
Avoid Leaning Forward – Leaning side to side is ok
Always maintain your weight centered over the wheel. When turning, you can shift your weight by leaning into the turn however you never want to lean forward. This will typically result in a nosedive.
Especially on trails, any un anticipated divots in the path will send some of your weight forward. If you are already riding with a slight forward lean, this could be the point in which you nosedive. Ride leaning back with pressure on the front foot. Use the weight in your hips.
How to Traverse Through Trails
When trail riding, you should habitually be traversing from the left and right shoulder of the tire. This actually will give you a stronger command of the terrain because you are harnessing your weight in small semi circles. You certainly can beeline down a path however I personally find, if I hit an unexpected root or rock when I carve, my knees are already bent and I can more easily absorb the shock.
Carving on a Onewheel – Making semi-circles / “S” Patterns
Constantly carving (making “S” patterns) along a trail will help with leg and foot fatigue. These constant left to right traverses will allow your leg muscles to take a break so that you do not overstrain them. Here are some points to consider when learning to carve on a Onewheel:
- At first, pretend you are carrying a large yoga ball with your arms.
- Toes or heels should not have to leave the footpads. Keep them flat on the pads.
- Rotating should use the weight of your hips as you turn your arms carrying an imaginary ball.
- Place your weight into the center of your carving circle.
If you are carving toe-side, lean over your toes
If carving heel-side, lean over your heels. - As you approach the central area of the path, you should already be preparing your rotation and weight in the opposite direction by carrying the ball to the other side of your body.
As you get practice, you wont need to carry an imaginary ball however your arms will still help keep the ‘sway’ balanced. Keep the semi-circles small. Remember, as you approach the middle of the trail, you should already be preparing to shift your weight to the opposite direction.
Why We Carve on a Onewheel
As you carve on a Onewheel, you are harnessing your momentum which helps you maintain or even increase your speed while riding. This is because carving involves using the board’s wheel to grip the terrain and create a “S” shape turn, which allows you to maintain your momentum as you change direction.
When carving, you’re able to use the natural forces of the turn to generate speed and accelerate out of the turn. This is different from skidding or sliding turns, where you may lose some momentum as you slide across the path. You are essentially keeping your weight into small powerful circles of movement.
In addition, carving can also help you maintain control and stability at higher speeds, making it a useful technique for advanced riders or those looking to challenge themselves on tougher terrain. Overall, carving on a Onewheel can be an effective way to harness your momentum and maintain or increase your speed while turning, while also providing a fun and challenging riding experience.
The most important reason we carve is to give your muscles mini-breaks. By traversing from heel and toe sides of the wheel, different muscles have to engage. These second or two breaks you give as you ride the opposite side ensures that you are not overly straining a muscle group. Constantly engaging the same muscle without any relaxation will likely cause straining and/or cramping.
Speeds on Trails with a Onewheel
We want to be mindful of other people on trails so bystanders and fellow riders are top priority. Never fly past someone as the Onewheel motor is extremely quiet and often they may not hear you (especially if they have headphones on). Announce yourself by simply saying “On your right!” or “On your left!”. Try to pass someone like you would in a car – always on your left. Sometimes that’s just not possible so just be clear.
Assuming the trail is yours and you are free to send it as you wish, try to keep speeds between 10-15mph (16-24kph) for safe travels. This will depend on terrain however when you are learning, you will tend to find that this range is a safe and moderate speed to enjoy the trail and maintain safety.
Avoid going too slow. It is possible to go too slow. If you are traveling under 5 mph (8 kpm), you may not have enough speed to help the wheel bonk over objects on a path (sticks, roots, rocks, divots, etc). Going too slow can be just as dangerous. The reason being is if you are going too slow where your wheel gets hung up on a rock or root, you may naturally push harder on the nose of the board to free the wheel. If the wheel becomes free, the board will dart forward and can cause you to fall.
Tip: Its always safer to maintain momentum along a trail especially rougher trails. This is less taxing on the motor which can also help prolong the range on your trail ride.
Keep a constant and relaxing speed. This will help the motor overcome mostly anything on a trail that is below 3″ in height or so.
Maneuvering and Bonking – When to Hit it or When to Quit it
So when do you decide to ride over an object on your Onewheel or when to maneuver around it? Generally, if the object is protrudes more than 3″ from the ground, go around. If its less than 3″, ride over it. Always try and attempt to avoid damp or wet surfaces on trails as they can be unpredictable.
Riding over object on a trail (or the street) on a Onewheel is referred to as ‘Bonking’. Its the cartoon sound your tire would make after you hit the object and go over it. Bonking is incredibly useful and has to be mastered in order to enjoy some flow on a trail.
Bonking on a Onewheel requires three steps:
- Compress
- Unweight
- Rebalance
This short video quickly demonstrates bonking over roots. You should always be riding in a somewhat compressed form by keeping your knees bent. You start to unload your weight (unweighting) as the object passes the front footpad. To unweight from the Onewheel, you are essentially jumping evenly with both feet and without leaving the board. Jumping enough to make yourself weightless for a moment.
By the time you are completely unweighted, the object will have passed your footpad and be hitting your tire. Because your board has little to no payload, it can travel over the object with speed and ease then simply rebalance and ride on.
The trick is to be unweighted as the rubber hits the object. If you do this well, it becomes seamless in your ride. Without de-weighting the board, the board has to try harder to overcome objects and may in some cases not overcome them leading to a nosedive. constantly popping up (unweighting) as you trail ride makes for good exercise and a smoother constant speed.
Tires and Tire PSI
We have only one wheel on our boards therefore it plays an essential role on a ride. Tires feel different. Some are geometric whereas some come more with a more rounded profile. Tires do invoke a large debate because they are personal to the rider. As you ride the stock tire, you will get a feel of what you may enjoy. Generally for trails however, you should seek a treaded tire. Whether its the stock treaded GT tire or an aftermarket tire, it will function better for trails over a slick tire.
Treaded or Slick
I personally rode my stock Vega slick tire on trails for over a 1000 miles without much of an issue. Slicks do work fine for trails however they don’t have the ‘bite’ you may sometimes need to climb a hill or get into tighter carves. Treaded are best for trails. Replacing a Onewheel tire may take about an hour of your time but the added confidence on trails is worth it.
If you are new to Onewheel, currently the only board you can buy with a treaded tire is the Onewheel GT. You can certainly find a used board with a treaded tire. See our used Onewheel buyer’s guide to help navigate a purchase.
Tire Softness for Trails
On trails, whether a tire is soft or not does not play as big of a role as if it is treaded or not. Floatlife Street Pro, Hoosier Whisper, Burris Trail Pro are softer tires however, the tread should be the focus. Certainly, if you are building an all around board, a harder rubber tire is better for hot asphalt as they can last longer but for the most part focus on a medium to soft tire. Trail riding puts less wear on the Onewheel tire which will give you more miles out of it than if you ride mostly on concrete or asphalt.
Tire rubber is rated based on its hardness or durometer, which is measured on the Shore A scale. The Shore A scale is a standard measure of the hardness of rubber however most Onewheel tire distributors do not provide the rating. You will have to seek reviews from fellow ridersregarding the softness of the tire (generally, most aftermarket tires will be softer than stock).
Tire PSI – What PSI is Best For Trail Riding on a Onewheel
Another contended topic is tire PSI for a Onewheel. This is also a personal choice and as you become more skilled, you will likely feel more comfortable with a more inflated tire. Underinflated tires decrease your board’s range however its generally more stable to ride on trails. The underinflated tire will grip a trail surface better.
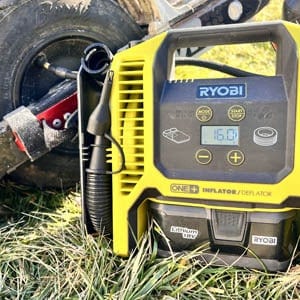
Check our Onewheel Tire PSI calculator for recommended street and trail PSI. Typically we want to have a lower PSI for trails over street riding. Its always handy to carry a tire gauge and a pump. I recommend everyone ride with a minimal sling and carry the essentials when riding on trails.
Safety Gear
Lastly is safety gear. Please see our recommended safety gear for Onewheel riding post. Riding on unfamiliar trails can be exciting but more dangerous as you do not know all the in’s and out’s of the trail. It’s always important to wear safety gear but extremely important on trails you are not familiar with.
The next best safety gear is riding with someone. That someone could be a Onewheel rider, EUC rider or even a mountain biker. We all hope we never get injured on a trail however it could happen. Having someone that can help you or find help is extremely important. Ride with someone and carry a phone with you.
Conclusion
Trail riding Onewheels can be extremely calming for the mind. Many do it for mental therapy. Its a stress reducing exercise that you will love. It also can be a great workout. You can increase the intensity by exaggerating the carves and speeding up your times. What is going to make for a great and memorable time is how well prepared you are for the trail ride.
Picking the right trail, riding under the right conditions and having the necessary gear on hand is going to ensure you have a blast. After you become proficient, connect with local riders and start a group ride. Stay safe and be a good Onewheel ambassador for the community. This goes a long way with bystanders and others we share the trails with. Stay Safe and get your float on!
Trail Riding Onewheel Must-do's
Hoping on a Onewheel and just hitting the streets or trails is certainly the easiest and painless way to ride. If you are planning longer trips however, there are some essential items you should...
Onewheels are customizable and often personalized for a rider. Trail riding is an amazing experience on any model onewheel. Choosing the best onewheel for trail riding and off-road use will come down...