
PEVs (Personal Electric Vehicles) are rapidly on the rise. Onewheels are one of the most popular PEVs. Riders continue to join the Onewheeling phenomenon due to their fun-factor. They are incredibly fun and enjoyable to ride while also doubling as a mode of transportation.
The Onewheel learning curve is very short. Many riders learn to balance within minutes. As a new rider, it is very feasible to obtain basic knowledge and board operation skills within an hour of use. While not as easy to ride as a traditional electric skateboard (e-skateboard), they are easier to ride than an EUC.
PEV Difficulty – Getting Started on a Onewheel
Many PEV’s (sometimes called plug-in electric vehicles instead of personal electric vehicles) are easier to ride than a Onewheel. All traditional electric skateboard platforms are generally less difficult to ride than the Onewheel due to their four-wheel base (such as the Evolve, Boosted, Enertion, iKon e-skateboards). The Onewheel and EUC (electric unicycle) are more difficult. That being said however, the Onewheel is far easier however than an Electric Unicycle. EUCs have a longer learning curve but most can accomplish basic functionality within a week of practice.
Both are technically self-balancing PEVs in which accelerometers and gyroscopes are used to balance the load. For this reason, the Onewheel and EUC are in a class of their own. They are a part of the PEV movement however they are not the traditional e-skateboards. Most bystanders however generally tend to clump the Onewheel into the electric skateboard category. While it is acceptable, Onewheels and EUCs are truly in their own class.
You can expect to learn to balance within the first 30 minutes of mounting a Onewheel. Onewheels have a heavy fan base due to the ride feel – often to referred to as floating. Spend an hour learning how to mount and dismount the Onewheel is worth the time.
How to ride a Onewheel – a Beginner’s Guide [Step by Step]
It truly is not hard to ride a Onewheel. The process is straight forward. Most riders feel relatively comfortable riding a Onewheel after a few hours of practice. Before you get on a Onewheel, it is important to know that there are a few models of Onewheel. Think of it as “small and large”. There is the Pint and Pint X which are smaller profiles and then there are the XR and GT models which have a larger width and length. (XR’s are since discontinued).
Selecting Your Onewheel
Choosing the right Onewheel for you will primarily depend on budget, weight and desired range. Our checklist post covers Onewheel selection for trail riding however if you just want to learn the basics and find which is best then it will essentially be which you feel comfortable
Because the Pint and Pint X have a smaller wheel, I personally do not recommend these for anyone over 6′ tall and or over 200lbs (90kgs). The Pints (standard Pint and Pint X) are rated for 250 lbs (113kgs) however if you even are consider trail riding, it will be more taxing on this board and a larger wheel and footpad is personally recommended. The advertised weight limit for Onewheels is 275lbs (113kg) on the GT.
If you are above 200lbs and or are taller than 6′, the XR or GT Onewheel will likely feel more comfortable. The footpads are wider and likely if you’re a little taller, these footpads are more accommodating for your feet. Please note there are aftermarket footpads that can widen the footpads. I cover a comparison between a Pint X and GT which may help your decision process.
Finding Your Stance
Getting started with Onewheel starts with finding your stance. Are you ‘goofy‘ or ‘regular‘ stance? This simply refers to which foot will lead first? Do you feel comfortable with a left foot or right foot in front when riding? If you havent ridden a skateboard or snowboard before, a simple way to find out which way your body prefers to ride would be to run and slide across a hardwood floor. Which foot does your body tend to use as a lead foot. This would be your stance.
Newer riders tend to want to put both feet on the very ends of the footpads thinking this will give them a more stable base. The controller does most of the front to back balancing. If you place your feet on the ends, your feet actually have to travel further to find its balance. This is counterintuitive to most beginners however it is easier to balance if you place your feet closer to the tire or at least in the center of each foot pad.
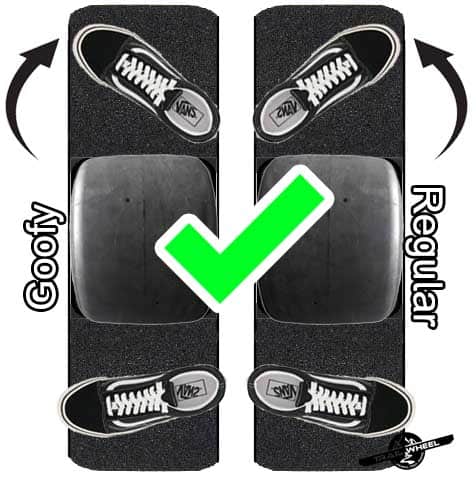
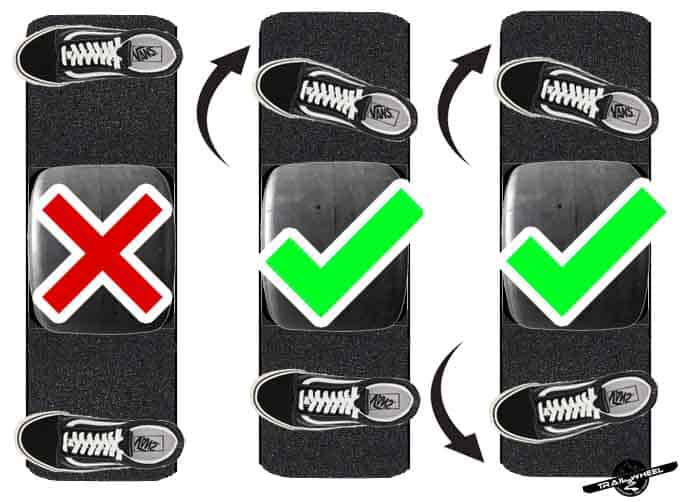
Avoid placing your feet on the very ends. Instead, place your feet as the picture illustrates. It is also easier to control any sort of wobbles if your feet are also slightly angled.
Remember, while we want to place our feet on the ends of the board with the idea that its going to widen our roots, because the Onewheel self-balances, to manipulate the balancing, your feet will actually travel further up and down when they are on the ends.
Its also harder to ride because you tend to be nose or tail heavy which could lead to nosedives. If your board feels a bit wobbly, try to angle your feet as its illustrated, this controls some of the side to side movement. Check our post on speed wobbles as well.
Select the Proper Digital Shaping
Before you decide to go for a little ride, its important to know that the Onewheel is configured with digital shaping. Digital shaping essentially alters the Onewheel’s performance and aggression (a riding mode). If its a friend’s Onewheel or if its one you’re borrowing or renting, you need to download the Onewheel app and pair to the board to change this riding mode.
A good beginner’s digital shaping profile is one of the first ones within the app. The name will vary for each board however Bay, Sequoia, Redwood are the names of the lowest settings for GT, XR and Pint X. Please check our spec sheets for each Onewheel. Here we cover digital shaping for the V1, Plus, XR, Pint, Pint X and GT. Just remember that the lower settings tend to have a lower max speed and a less aggressive acceleration. Once you become proficient, you will want to change the digital shaping.
Mounting and Dismounting a Onewheel
Before you start riding, you need to learn how to get on and off the Onewheel. Most injuries on a Onewheel occur from two areas: exceeding the board’s limits and getting off a Onewheel. It’s crucial that you understand that the front of the Onewheel (the side that is pointing upwards when its at rest), is the sensor of the Onewheel. This sensor has two pads that activate the motor when both are engaged. If you are going less than 1 mph and if one of the sensors disengages, then the motor will stop. Otherwise it will continue to stay balanced.
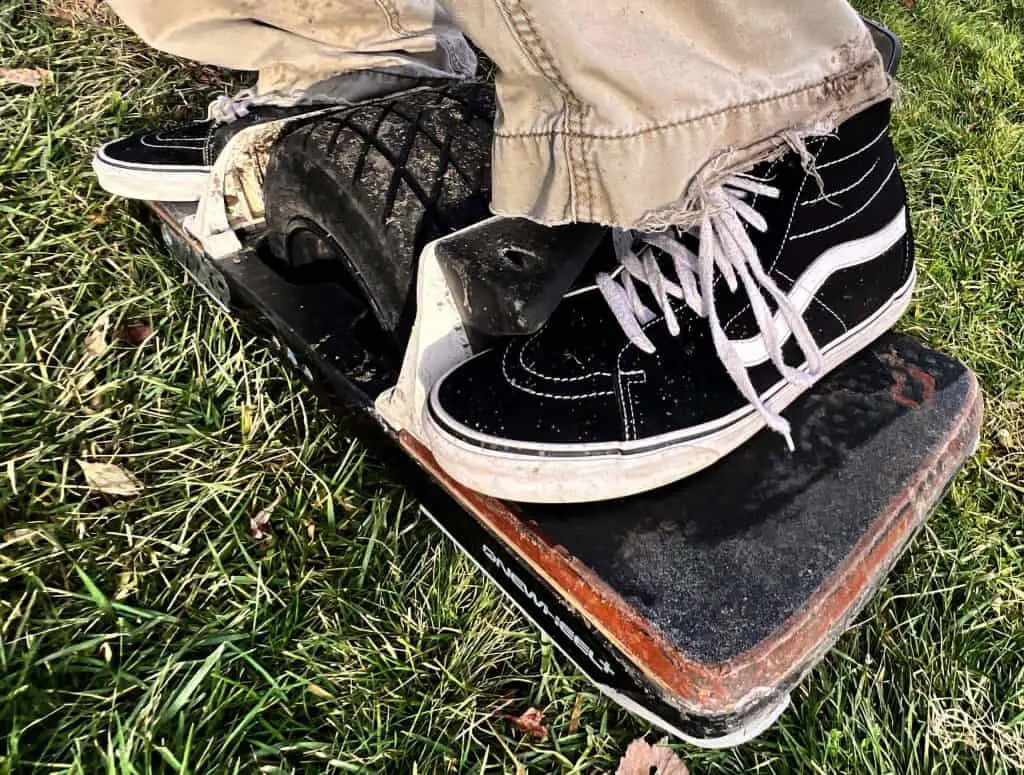
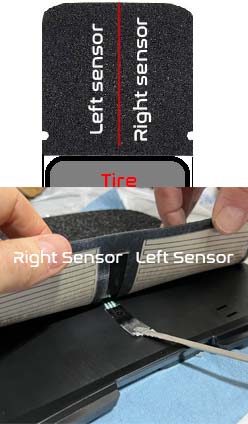
So how do new riders become injured when dismounting a Onewheel? The common mistake new riders make is that they take their rear foot off first which would leave the motor engaged. This will cause the Onewheel to dart forward likely leading you to do the splits and fall to the ground. People panic. In the moment they dont think and want to just get off. Never take the rear foot off first when getting off a Onewheel.
There are four ways to dismount the Onewheel. These are rated by most easiest:
- Simplestop
- Jumping off with both feet
- Heel stop or toe stop
- Quick stop
Simplestop is by far the easiest way to dismount a Onewheel. This is a setting that is located within the app. We cover this within our post on how to activate and deactivate Simplestop. The main thing to remember with Simplestop engaged is that the Onewheel cannot reverse when its activated.
Jumping off with both feet is the next safest way to get off a Onewheel safely. Make sure to push off both footpads equally and jump in front of you landing on the side of the board.
A toe or heel stop is when you lift your toe or your heel from your leading foot as you slow down. When you fall below 1 mph and have one side of the sensor disengaged (pressure off the pad), the motor will disengage and you can step off the board safely.
“Quickstops” are intended for intermediate and advanced riders. It looks very clean when done properly. For a quickstop, you do need a moderate amount of speed (at least 5mph or so). For a quickstop, you have to quickly remove the front foot and land it on the ground aside your trailing foot. This will sometimes look like a skid stop can really impress bystanders. This is harder to achieve because if you do not remove the lead foot fast enough, your board will reverse unexpectedly on you. This one takes practice.
Mounting a Onewheel
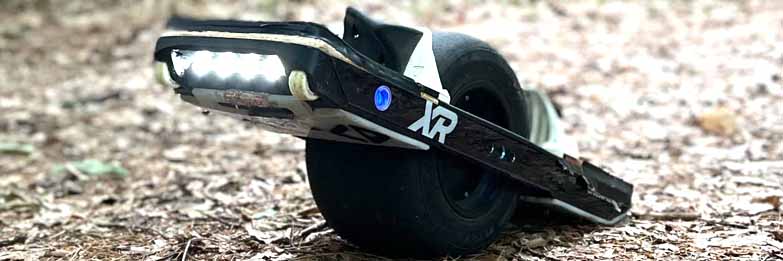
Mounting a Onewheel is far easier than dismounting. It doesn’t matter what model Onewheel you have (Pint, XR or GT), mounting is all the same. After you have found your proper stance, here’s how you mount the Onewheel (sequence here matters):
- Find your stance (regular or goofy).
- The rear foot is positioned first on the side of the onewheel that is resting on the ground (battery side).
- Once your rear foot is positioned, place your leading foot on the front side of the Onewheel (sensor side).
- Place weight on the sensor side equalizing your weight on both footpads.
- You should be balanced on the Onewheel.
Riding a Onewheel
Now that you have learned how to mount and dismount, riding is a breeze and most riders describe the ride as very intuitive and feels like the onewheel is an extension of your body. If you have not selected the digital shaping profile that is for you, please go to the app and confirm you are riding a more subdued profile (Sequoia, Redwood, Bay, etc).

The motor of the Onewheel is engaged by the pitch of the nose (sensor side) of the Onewheel). If you push the sensor side downward (give it just light pressure), it will accelerate. Inversely, if you lift the sensor side, it will slow down and begin to reverse if you go beyond stopping point (assuming Simplestop is shut off). We always want to make sure our body mass is centered above the tire. We do not want to lean forward with our whole body as this can easily overpower the board and trigger a nosedive. Instead, we want to use the weight in our hips. Shift the hip weight over the Onewheel will accelerate the board.
To carve, we simply rotate our shoulders slightly in the direction we want to carve. Always make sure when you are riding that your knees are bent. This will allow for some of the shock of the road to be absorbed by your legs for a more enjoyable ride. When carving, we do not really angle our feet, instead its a subtle sway and rotation of our body mass.
Safety
It cannot be understated enough. Safety is top priority. At the bare minimum as a new rider, a helmet is a must. I’ve seen new riders fall and quickly say “Nope! Not for me.” Give the ride a chance and be prepared to learn and fall a couple times. Onewheeling (when in the appropriate speed range) is relatively safe. Stay equipped for a fall when learning will keep you from injury and allow for an enjoyable learning experience.
I recommend for new riders that they wear a basic skateboard helmet and wrist guards at a minimum. When I trail ride, I personally wear an armored flannel, helmet, knee / shin pad, and wrist guards. If its colder out, I will wear a full face helmet but this is just for comfort. Practice the use of protective wear by making it always easy to access and put on before a ride.
Tips for Avoiding Injury
Adhere to the information above and these tips and avoid injury. Without any injury, the riding experience will be memorable and wanting you to ride more. Here are my top tips for avoiding an accident or injury:
- Wear safety gear. I am guilty of it at times if I’m riding in front of my house, but safety gear is crucial especially when learning how the Onewheel’s electric motor works and reacts to your movements. Play safe and have fun!
- Never exceed the advertised top speed of the Onewheel (16mph for the Pint, 18mph for Pint X, and 20mph for GT).
- Always respect Pushback. If the nose of the board is lifting upwards, you need to slow down.
- Frequently check your battery level. If the board is below 20%, stay close to your home or car. You may feel pushback sooner than at 0% battery.
- Avoid water and slippery surfaces. The current three models available (Pint, Pint X and GT) are water resistant to some degree however there is no IP rating. Don’t ruin a good time by damaging the board or slipping off.
- Remember that Onewheel is a self balancing electric skateboard. It wants to intuitively balance the load. As a rider, we just need light pressure in either direction. Do not push too hard.
- Electric skateboards are similar but they are not the same. Some new riders from from the traditional e-skateboard world and assume everything operates the same. The main thing to remember is that this Onewheel will nosedive if you exceed the limits of the board. Traditional skateboards just top out. This is the trade off for off road capabilities and that float feeling.
The CPSC issued a warning that Onewheels are unsafe because of an ejection hazard? Future Motion addressed a recall for the GT line however this is regarding all Onewheels. This is a hot topic as most riders do not understand where this warning is coming from? Few deaths have occured however in comparison to skateboarding which is approximately 40 per year, Onewheels are safer.
As long as the rider respects the limits of the board, doesnt modify its function and is aware of the battery level, Onewheels do not eject the rider. Always wear safety gear. Also, please consider other e-skateboards. The more that enter the movement the better. We have a guide in what to look for when purchasing an off-road PEV.
Frequently Asked Questions (F.A.Q.s)
Because a skateboard has four wheels, it naturally will be easier to mount, dismount and ride however the learning curve to riding a Onewheel is short. The tradeoff for the feeling of that “float effect” is well worth the time to learn. In short however, basic operation and riding of a Onewheel is not easier than the same operations to a skateboard.
Most common Onewheel injuries are due to overpowering the Onewheel (not respecting pushback) or improper dismounting of the Onewheel.
This is known as foot fatigue and is common with riding Onewheels. A concave or foam foot pads may alleviate some of the pain. Carving frequently is the best way to avoid cramping and foot fatigue. Also consider taking more frequent breaks until your leg muscles build up.
Future Motion recommends an age minimum of 13 years. That being said however the Razor Pocket Mod scooter for children also has an age minimum of 13 years old. While this is a recommendation, if your child has ridden a hoverboard or snowboard, likely they would be able to ride a Onewheel fairly easily. Learning curves are short. Just remember that if your child asks for a Onewheel, these are different than hoverboards.
It really matters which Onewheel fits you. Check out the board selection area above. The better question to ask is which digital shaping mode is easiest to ride? Digital shaping will alter how the board functions. Pick a Onewheel that fits your body and be aware of the riding profile that is set. Stay with an entry level profile (Bay, Redwood, Sequoia).
You can learn within minutes and within an hour you likely will have the ability to mount, dismount and ride a Onewheel. Feeling comfortable on the ride however may take weeks if not months to overcome foot fatigue and cramping. The more you ride, the more the muscles train which helps. Learning to carve plays a huge role in avoiding cramping. 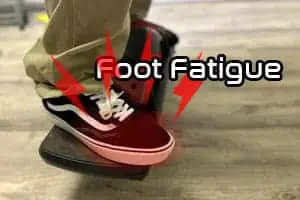
I personally think these are harder for my body type. I weight approximately 190 lbs. With a smaller tire, I find that trail riding is more challenging than on my XR or GT. Both are fun but the Pint does pose more of a challenge. The Pint is considered to be more nimble so balancing sometimes may feel harder. The answer here is it depends on your body. If you weight below 175lbs, it likely isnt much of a difference.
No. It is also to be noted that Onewheel and hoverboard are different. The general public does often reference Onewheels as sideways hoverboards however they are technically separate products.

3 thoughts on “Are Onewheels Easy to Ride?”